
What is a Law School Outline?
From day one of law school, you’ve heard professors and classmates talk about the importance of outlining. Law school outlines are summaries of the content you learn during law school and bar prep. They are a key tool to help you digest and review important concepts covered in your studies, so it’s important to learn how to outline effectively. The following tips will help you learn how.
Why Should I Outline?
You’ll likely have access to commercial outlines and outlines created by other students, and you may want to rely on those outlines to study. While it’s useful to look at others’ outlines to get a sense of how they have tackled subjects, there are several benefits to developing your own.
- Trust the process: It can be difficult during the day-to-day of law school and bar prep to see how concepts fit together. Outlining allows you to make connections between concepts so that you can see the forest through the trees. Outlining also teaches you what you know and (more importantly) what you don’t know in each subject. This allows you to determine which areas will require extra study time before exam day.
- Active learning: Instead of passively reading someone else’s outline, taking the time to develop your own outline engages you in active learning. This teaching method has been shown to improve students’ performance across a range of disciplines. To better retain the multitude of rules covered during your legal studies, you can use phrasing and images that make sense to you. You can also have a bit of fun with your outline by thinking up clever mnemonics to help you remember important information.
- Exam attack plan: Outlining also serves as a plan of attack to efficiently answer exam questions, especially essay questions. For example, if you have an essay question on the bar exam that focuses on diversity subject-matter jurisdiction, you can set up your answer to mirror how you structured your outline. Doing this will help you develop a cohesive explanation that is well organized and easy to read.
How to make Law School Outlines?
It depends. Yes, we know you’re sick of hearing that. But the best part about creating your own outline is that you can design it however works best for you!
- Personalize and customize: Each person learns differently, so it’s important to structure your outline based on your preferred learning style. If you learn best by reading and writing (verbal learning), then create a text-based outline. Conversely, if you learn best through images and diagrams (visual learning), then create an outline with flowcharts, timelines, and other illustrations. Don’t be afraid to get creative! What’s important is that your outline is set up to help you best learn the material.
- Organize: Regardless of how you decide to structure your outline, you’ll want to organize it in a coherent way. A common approach to outlining is to start broad and then narrow your focus as follows:
- This may seem obvious, but you should create a separate law outline for each subject. Have one for Federal Civil Procedure and a separate one for Constitutional Law. Mixing subjects can lead to confusing similar rules and terminology that can hurt you on exam day.
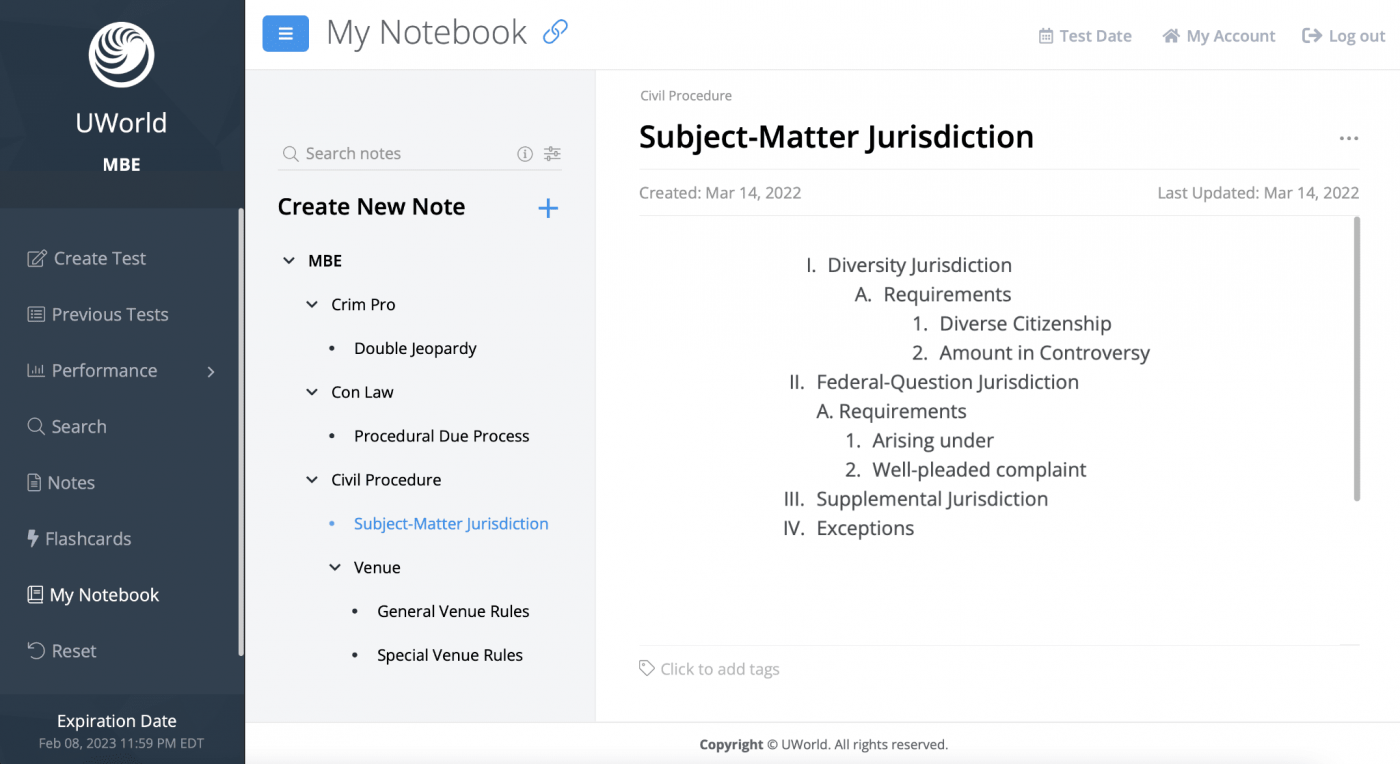
- Create a skeleton outline that focuses on the major topics and subtopics. This bare-bones (pun intended) outline allows you to get a sense of the big picture for each subject. It also allows you to easily differentiate between the major topics, which will help when you later to fill in the details. The syllabus from your law school class or bar prep course will be extremely helpful in setting this up. Here’s an example of a skeleton outline created in UWorld’s “My Notebook.”
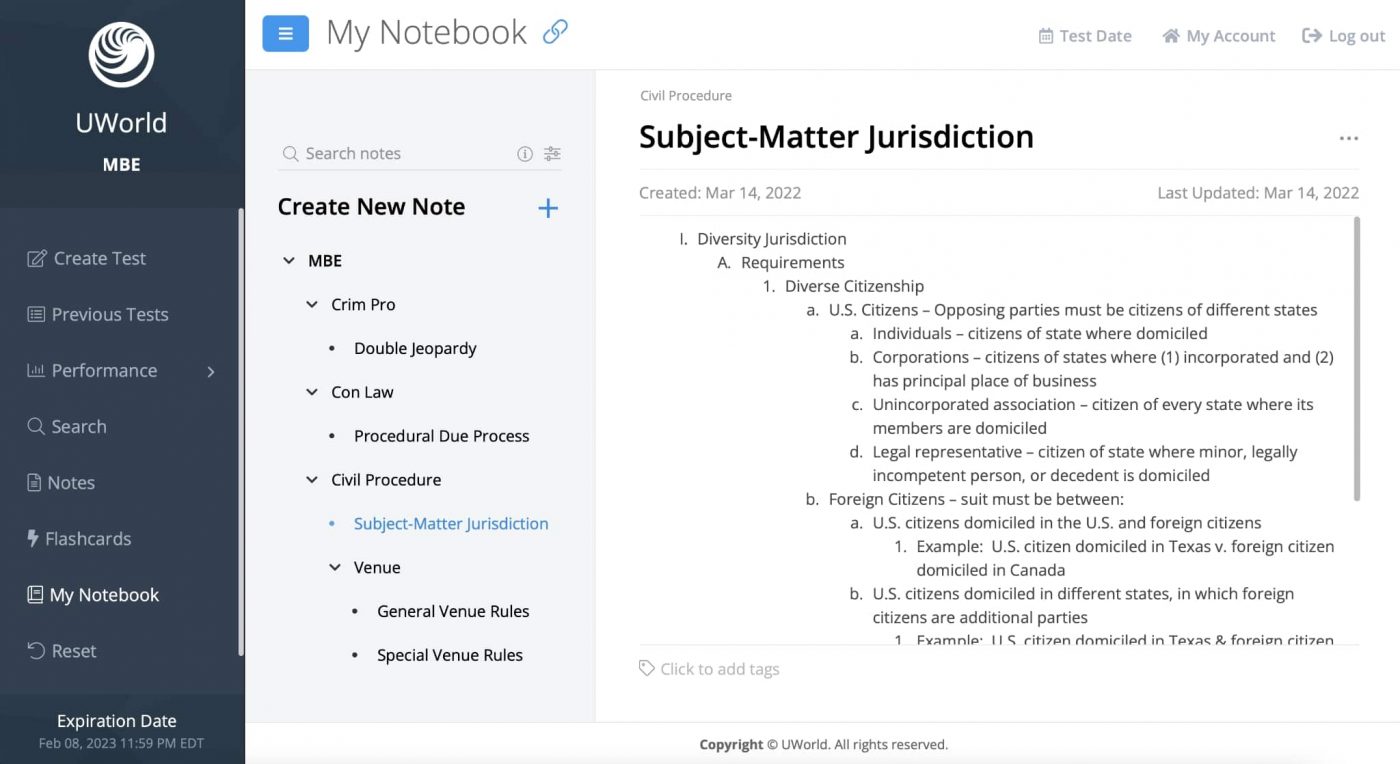
- Detail the elements, requirements, and/or steps for each fundamental rule. Each concept will have varying levels of specificity. The key is to be as detailed as possible to ensure that you have all the necessary information for exam day. Also, don’t forget to include the exceptions to each rule, as these are frequently tested in law school courses and on the bar exam.
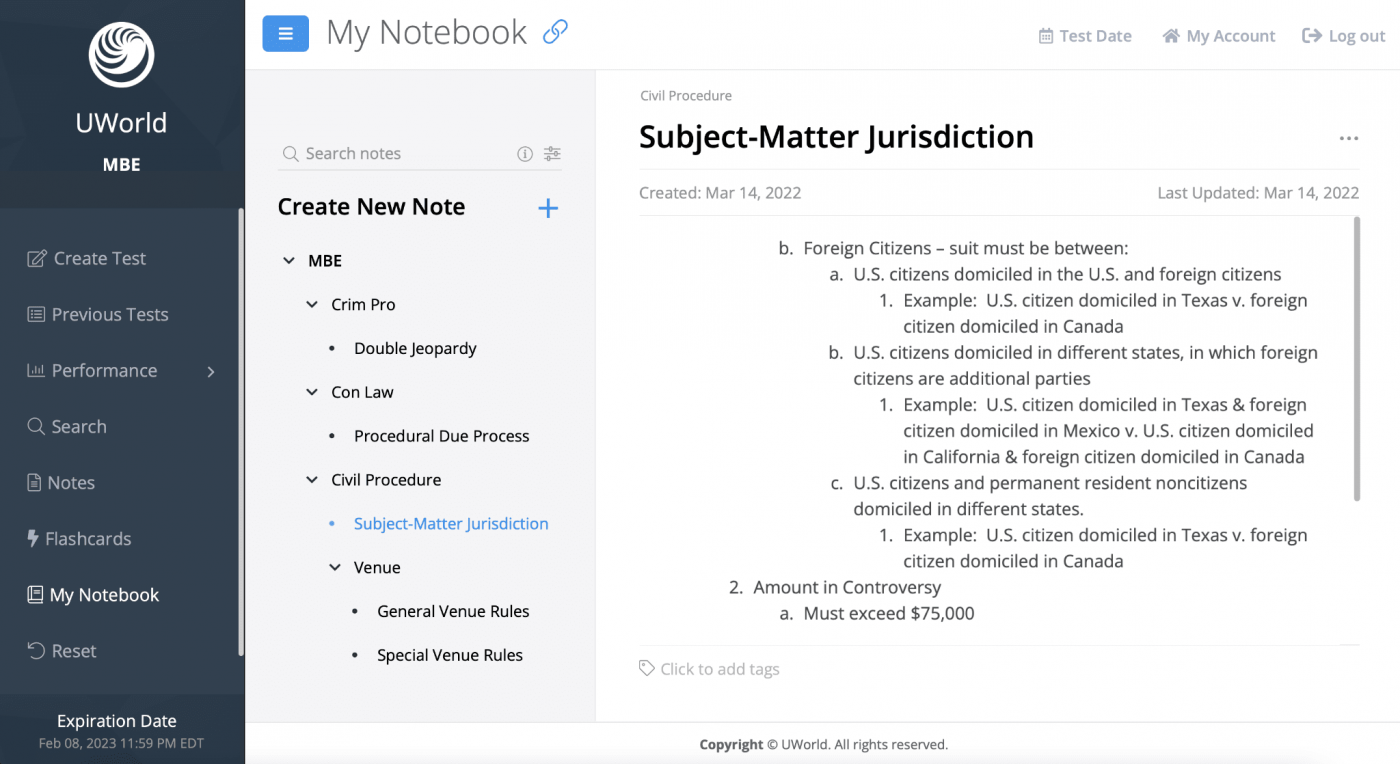
- Make the rules and elements come to life by adding examples, hypotheticals, or facts from applicable cases. This extra step can really help solidify a concept because these examples help you see how the rules apply in real life. It will also help you identify specific fact patterns used on the exam, especially if your test questions are based on specific cases or other real-world examples.
I’ve Completed My Outlines. Now What?
Completing drafts of your law outlines is an impressive feat, but the process isn’t over just yet. Think of your outlines as living documents that should be revised and synthesized as you approach exam day.
- Fill in the gaps and identify areas of concern: As you outline, identify where you need more information and areas that you’re struggling to comprehend. It could be that the information was presented in a way that is not conducive to your preferred method of learning. You can talk to a professor, refer to your bar prep materials, or seek out additional sources to supplement your outline with the necessary information. You can then put the information in a format that makes the most sense to you.
- Synthesize the information: First drafts of outlines can range from 50 to 100 pages, which can seem daunting as you use them to prepare for an exam. Synthesizing your outlines into “attack outlines” or “one sheets” makes it easier to memorize the information for exam day. These condensed outlines are typically 15 to 20 pages and should be designed to address the main concepts. Use keywords as a catchall for nuanced concepts, summarize examples into a one-line synopsis, and develop acronyms or mnemonics to distill information into its most condensed form. Again, there is no one-size-fits-all approach to this process. Your outline may look like a secret code to another classmate, but that’s OK as long as you can decipher it!
- Test it out: The only way to know for sure if your outline is up to par is to use it to answer practice exam questions provided by your professor or bar prep course. If you find that your outline didn’t help you score as well as you’d hoped, then revise your outline accordingly. It could be that you need to include more information about a particular rule or more examples to help you identify fact patterns that may appear on the exam. Once you revise your outline, keep testing it. This process will not only help you develop a better outline—it will help you better understand the rules.
You can easily create your own outlines with the new My Notebook feature in the UWorld MBE® QBank. Click here for our FREE trial. The UWorld MBE QBank will have you ready to ace the MBE on exam day.
MBE® is a registered trademark of The National Conference of Bar Examiners® (NCBE®). NCBE does not endorse, promote, or warrant the accuracy or quality of the products or services offered by UWorld Legal.
References
Brame, C. (2016). Active Learning, Vanderbilt University Center for Teaching. Retrieved March 14, 2022 from https://cft.vanderbilt.edu/active-learning/.
Kate E. Bloch, Cognition and Star Trek(R): Learning and Legal Education, 42 J. Marshall L. Rev. 959, 967-68 (2009).